This post contains affiliate links, which means I may earn some money if you click on one. Don't worry, there is no additional cost to you. Thank you for supporting my blog.
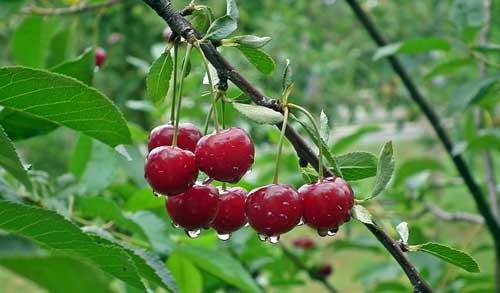
Last year I did an experiment. I bought a 10 pound box of cherries through the CSA I belong too. I knew I would not consume 10 lbs of cherries in 5 days, so I would have to freeze them or dehydrate them. I of course had never done this before, but it’s a lot more fun to jump into the fire, right? Fortunately, I at least had the foresight to do a little bit of research and buy a cherry pitter before I picked up the big box of cherries. (Amazon Prime really saved the day with the 2 day shipping).
My mom and my aunt just happened to be visiting at the time, (to help me out with some other stuff), so I was fortunate to have some help with this project. I am sure they were sort of questioning my sanity though, washing, pitting, freezing, and dehydrating this huge box of cherries. It was a lot of work, and it was time consuming. (The pitting of the cherries added a lot of labor). But we got it done. I dehydrated most of them and froze the rest.
The experiment was a success, everything worked out well. However, I regretted that I had dehydrated most of them. I thought frozen cherries were delicious, much better tasting than the dehydrated cherries. In fact, tossing one of the frozen cherries in my mouth was like eating a cherry ice without the added sugar. Frozen sweet cherries are DELICIOUS.
Believe it or not the ten pounds of cherries did not last very long. I did not ration them and they were so good! So I decided to get the bigger box next year. In fact, I have been anticipating the arrival of the sweet cherries for many months now. Good quality frozen cherries are EXPENSIVE in the grocery store, and many of the bags I have seen in the freezer at the grocery store were even past the expiration date. So I had to wait for the harvest to get the good stuff.
So this past week I ordered and picked up my 20 lb box of sweet cherries. On day one I immediately went to work, trying to preserve them while they were FRESH.I thought I would share some tips on what worked, and what did not work, in case someone else just got a big box of cherries and is not sure what to do with it.

Freezing Sweet Cherries
Step 1– Wash your cherries, and drain the extra water off them.
Step 2– Pit your cherries. This step is the most labor intensive, time consuming step. I don’t think it is necessary if you freeze them, However; if you plan on using the cherries in smoothies, it will make life easier for you later. I have a young daughter who I give them to, so it is a lot easier to cut the frozen cherries in half if they are pitted. I used this cherry pitter.
Step 3 – Line trays with parchment paper and line up the cherries on the trays. Again, you don’t HAVE to do it this way. You could probably just put the pitted cherries in a bag and stick them in the freezer. However, if you freeze the cherries in a single layer, then they will not stick together when they freeze. It will be easier to pull them out of a bag for snacking or smoothies. I found that freezing them in one layer makes it easier to store as well. (If you have OCD like me, you will understand what I mean once you try it this way). The bags freeze well flat.
Step 4 – Freeze them on the trays for at least 2 hours in a single layer on the trays.
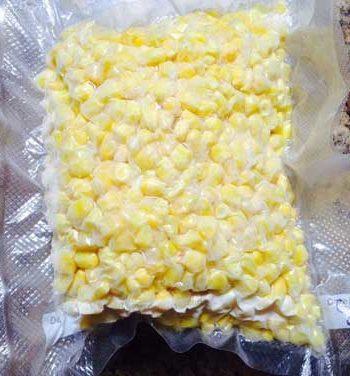
Step 5 – Place the cherries in some sort of freezer bag, removing most of the oxygen. I use a food saver which is very effective. When preserved in this manner the frozen sweet cherries will last 6-8 months. The Food Saver was a good investment for me, it does seem to prevent freezer burn and preserve the food very nicely.
Step 6– Label your cherries with the contents and date. (This is an important step for me. I am a “when in doubt throw it out” sort of person. My memory is good but I do not want to rely on it when it comes to food quality or food safety). Spend the extra 2 minutes using a sharpie and label your product.
So that’s it. It took me a long time to freeze the first 5 lbs because I was not organized. By round two I had a good assembly line set up. After washing and draining the cherries, I set the large stainless steel bowl on the table, the pitter and the parchment lined tray in front of me. I pitted six cherries at a time and lined them up on a tray. I had a separate large container on the table as well to dump the pits into when it got pretty full. I did not time myself at first because I was multitasking, (and my three year old daughter was helping me). But I did time myself on day three when I dehydrated the cherries. There was an extra step involved, (cutting the cherries in half). With the extra step it took just over an hour to prepare 5 lbs of sweet cherries.
Dehydrating Sweet Cherries
Step 1– Wash your cherries, and drain the extra water off them. There is an optional step you can add here to preserve the color. (I did not do this last year). I added ascorbic acid (citric acid), 2.5 teaspoons per quart of water.
Step 2– Pit your cherries. This step is the most labor intensive, time consuming step. This step does seem to be necessary if you dehydrate them. If you do not remove the pit, the cherries probably won’t dehydrate evenly. I used this cherry pitter.
Step 3 – Cut the pitted cherries in half. This step is optional. Last year I did not cut the cherries in half and it worked fine. However, it takes longer. (48-72 hours). This was the reference I used last year – source.
Step 4 – Dehydrate the cherries. I use an Excalibur dehydrator. The instructions in the Excalibur book say to dehydrate at 145 F for 2 hours then at 135 F for the remaining time. (Approximately 24 hours if you cut the cherries in half first).
Step 5 – Last year I stored the cherries in food saver bags and kept them in the freezer. When you dehydrate you do not have to keep them in the freezer, but since I was new to dehydrating I was concerned I might not have removed enough moisture. This time I am conditioning the dehydrated cherries to check the moisture content; then I will most likely store them in a mason jar and remove extra oxygen. (I use this accessory for the FoodSaver to do this). I might still freeze them for a few weeks, which will pasteurize them, and make them safer for long term storage. (By long term I mean a year, I do not feel comfortable storing it longer than that.
Step 6– Label your cherries with the contents and date.

Even if you decide to dehydrate your cherries and stick them in the freezer, for long term storage, you still save a lot of space!! I was able to fit 3 lbs of cherries in a quart mason jar with room to spare. (You need some space at the top for the conditioning process). So if you are new to dehydrating, and worried your cherries will spoil, dehydrating and freezing is a good option for you.
So that is my sweet cherry experiment. The last batch of cherries are dehydrating in the Excalibur right now; and should be ready this afternoon. (I am happy to be done. I love sweet cherries but I am tired of them right now).
Next project – blueberries.
How do you preserve cherries? Do you prefer frozen or dehydrated cherries?
No Comments